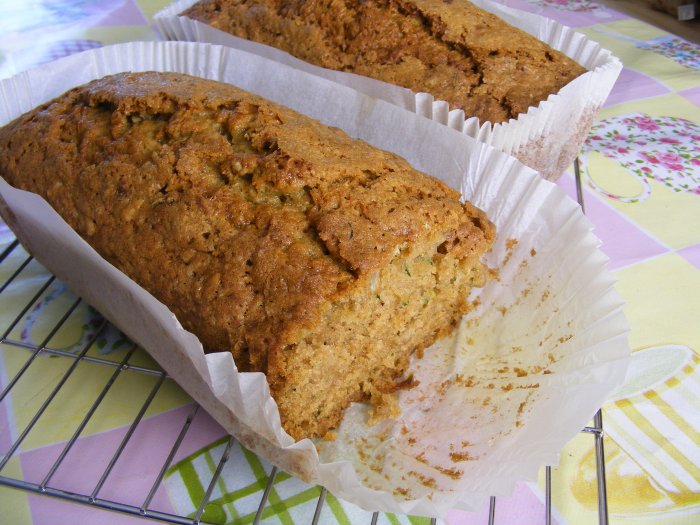
Courgette Tea Loaf

DSCF5711

I think I’ve mentioned before that I always provide a freshly baked “something” for my ladies to have with a cuppa at sugarcraft class but it is not often they provide me with food. That is exactly what happened last night! I was given two large, homegrown courgettes (zucchini) with instructions to “Do something with them!”.

So when I got home I hit the books and found several recipes for courgette cake and zucchini bread. I have tried to make a courgette cake before but I really didn’t like it as I found it quite dense and tasteless. The recipe I settled on was by Rachel Allen, from her book “Bake”. I liked the look of this recipe because it had plenty of spices added to it and reminded me of a good carrot cake but with courgettes instead of carrots.

I took the liberty of tinkering with the ingredients slightly to suit my palate and the ingredients I had to hand. Rachel’s recipe calls for walnuts but I substituted them for sunflower seeds as I didn’t have any walnuts in stock.

This tea loaf is lovely and moist with the warm, spicy hit of traditional tea loaf. Rachel said her recipe is lovely toasted with a bit of butter and I can safely say I will be trying that in the morning for breakfast.

Ingredients

  • 400g plain flour
  • 0.5 tsp salt
  • 1 tsp bicarbonate of soda
  • 0.5 tsp baking powder
  • 1 tsp cinnamon (heaped)
  • 0.5 tsp freshly grated nutmeg
  • 0.25 tsp ground cloves (level)
  • 300g caster sugar
  • 100g Demerara  sugar
  • 3 eggs
  • 200ml sunflower oil
  • 2 tsp vanilla extract
  • 380g grated courgette (skin and flesh)
  • 75g sunflower seeds


Method

  1. Preheat the oven to 150C /130C fan or gas mark 2
  2. Line 2 loaf tins
  3. Sift together all the dry ingredients into a large bowl
  4. Add the courgettes and seeds
  5. Add the wet ingredients and mix well
  6. Divide the mixture between the 2 tins
  7. Bake for 1hr – 1hr 15min depending on oven and how evenly you divided the mixture.
  8. Allow to cool int he tin for 20-30 min before turning out onto a cooling rack.

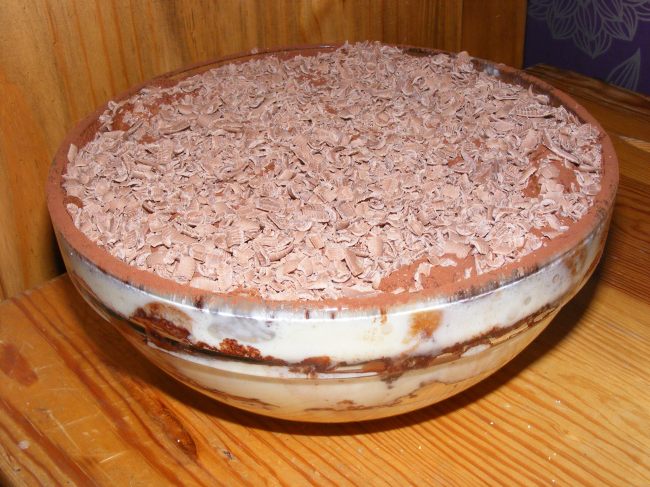
Triple chocolate tiramisu

ImageMany, many years ago, whilst I was working for Liverpool University, I had the good fortune to work with a lovely lady called Mariana Catapano. Mariana was living in student accommodation whilst on sabbatical with us but unfortunately didn’t have a television in her room. As an avid football fan who never missed a match, this was a fate worse than death. Consequently she would often come to my house for her tea and to watch the footie. Her contribution to the meal was a homemade tiramisu.

Now. Mariana told me that this was her grandmother’s recipe and that truly authentic tiramisu does not contain alcohol. Hey, she is Italian so I’m not going to argue with her!


I have been making Mariana’s tiramisu for the past 20 years and have never had a complaint. Not everyone likes coffee flavoured desserts, however. I’m sure if I tried to give it to my sister she would think I was trying to poison her! As a consequence and because I have a friend coming for tea who is in need of a bit of cheering up (tiramisu actually means “pick you up”), I have had a play with the recipe and come up with this coffee free alternative.

Ingredients

  • 3 egg yolks
  • 2 egg whites, whisked to a stiff peak
  • 200 g caster sugar
  • 1 standard tub of mascarpone cheese
  • 300 ml hot chocolate or chocolate milkshake, warm
  • 1 pack of sponge fingers
  • 300g grated chocolate
  • 4 – 5 tbs cocoa

Method

  1. Whisk the egg yolks and sugar together until light and fluffy
  2. Beat in the mascarpone
  3. Fold the whisked egg whites into custard.
  4. Dip the sponge fingers into the hot chocolate and allow to soak up a little of the liquid then layer into a glass bowl.
  5. Pour over a layer of the custard
  6. Sift a little of the cocoa over the custard and then sprinkle over a layer of grated chocolate
  7. Repeat the layers until you have used up all the ingredients, making sure to finish on the cocoa and grated chocolate layer.
  8. Pop it in the fridge and chill for 3-4 hours or ideally overnight.

Obviously this recipe does contain raw eggs so should not be given to pregnant women, the elderly or infirm and the very young.


Jumbleberry Jam

DSCF5526

It has been a while since I have blogged but in fairness I have been ridiculously busy with birthday and wedding cakes. I am pleased to say I have become so popular that I am turning work away as I simply cannot fit another cake in!

I have, however, discovered the magical art of jam making! I have been making chutney for a few years, much to my son’s disgust! He cannot abide the smell of it cooking! If truth be told, I was always a bit frightened of having a go at jam making. It brought back disturbing memories of standing on a chair stirring my grandmother’s gooseberry jam which was that tough you couldn’t get a spoon into the jar!

I plucked up some courage, however, and decided to give it a go. Rather than waste money on lots of expensive fruit (in case I ruined it) I bought 800g of strawberries, raspberries, blackberries and blueberries from the bargain bin of my local supermarket. Yes, they might not be the prettiest of fruit or value for money if I wanted to keep them in a fridge for a week but they were ideal for my purpose. Let’s face it, they were going to be cut up, mashed and boiled they didn’t need to be pretty.

The first time I tried this I bought special preserving sugar and it worked beautifully but that sugar can be quite expensive so I switched to regular granulated sugar and powdered pectin. It works just as well and at a fraction of the price.

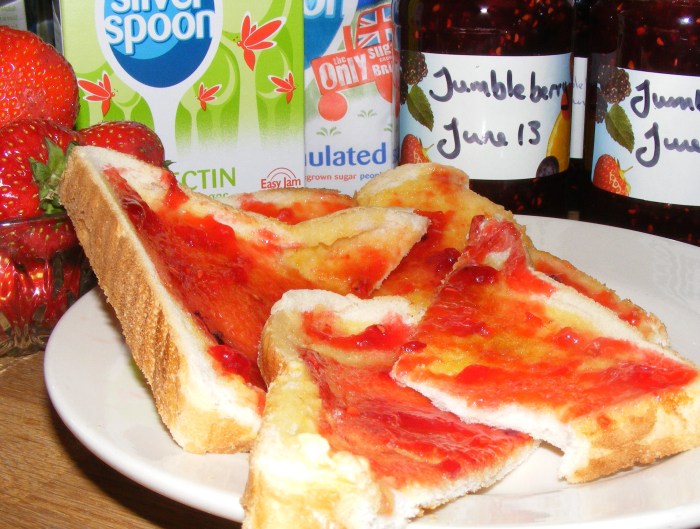
Jumbleberry jam is, quite literally, a jumble of different soft fruits. The jam is naturally scarlet in colour and tastes just like the jam you get in jam doughnuts! Mmmm!

This recipe is idiot proof so be brave and have a go!

ingredients:

  • 800g mixed soft fruits (strawberries, raspberries, blackberries and blueberries)
  • 1kg granulated sugar
  • 1pk Silver Spoon pectin
  • Knob of butter (to stop a scum forming)

Method

  1. Sterilise your jam jars and lids. I did mine in the dishwasher but boiling water or heating in the oven works just as well. By doing it in the dishwasher I can time the cycle finishing with when the jam is ready.
  2. Prepare the fruit by removing any cores and  slicing the larger fruit.
  3. Mash the fruit or blitz in a food processor for a few minutes. The more you mash them the less lumpy your jam will be.
  4. Add the fruit to a large saucepan, add the sugar and pectin.
  5. Heat gently, stirring constantly until the sugar has dissolved.
  6. Add the knob of butter
  7. Slowly increase the heat, stirring constantly.
  8. Once the jam reaches a rolling boil i.e. when the volume rises and  the bubbles dont disappear when you stir the jam, start timing for exactly FOUR MINUTES.
  9. Immediately remove from the heat and ladle into hot jam jars. Seal immediately and allow to cool and set.

The jam will keep a good 6-9 months in a sealed jam.

Amaretti biscuits

Amaretti biscuits
Amaretti biscuits

I’m sure I have mentioned on more than one occasion that my big weakness is biscuits. I can take of leave cake and don’t go overboard about chocolate but biscuits! Oh, my goodness! I have no self-control at all.

As a child I only ever got “posh” biscuits at Christmas and that was because Mum was a nurse. As you might expect her ward would be inundated with tins of biscuits for the nurses at Christmas. The ward sister would do a “lucky dip” so the nurses all had a fair chance of getting the expensive biscuits as well as the less expensive. So Mum might come home with a box of chocolate fingers or a really posh box of Marks and Spencer’s Continental biscuits! You can imagine my excitement!

One year, however, she came home with a box of individually wrapped amaretti biscuits. I had never seen them before and was intrigued by them. Unfortunately, one bite and I’ve been hooked on them ever since!

This particular recipe is from The Hairy Bikers’ Big Book of Baking. It is so easy to make but I found that I couldn’t pipe the biscuits as Si and Dave suggest because the dough was simply too stiff so I rolled them into ball instead.  They are crisp on the outside with a slightly soft centre and taste absolutely gorgeous.

Ingredients:

2 large egg whites

200g caster sugar

0.5 tsp almond extract

300g ground almonds


Method:

  1. Preheat the oven to 170 C/ 150C fan (the bikers suggest 190 c/ 170C fan but I found they browned too quickly)
  2. Beat the egg whites with an electric hand mixer
  3. Slowly add the sugar, whisking constantly
  4. Add the almond extract
  5. Fold in the almonds. It will form a stiff dough
  6. Pipe or roll into small balls.
  7. Bake for 12-15 minutes.


Carrot cake with a Praline topping

74715_4115742294432_1634963362_n


I have come to the conclusion that I must have been Genghis Khan in a previous life! I’m a good girl! I don’t smoke, drink or do drugs (I don’t think HRT can be considered hardcore!). I have been single for 13 years and to be honest I haven’t got time or the inclination for man hunting! Now that I’ve said all that, all I seem to get at the moment is stress!

My son, as I have mentioned before, as Chronic Pain Syndrome so for the past 3 weeks we have struggled to keep his legs moving. This resulted in him collapsing in the bathroom the other night. Ben is about 8 inches taller than me and a big strapping 15-year-old! Needless to say trying to rescue him was interesting to say the least! Thank goodness we have very large bath towels!

Then to top it all, my poor little whippet, Felix, who broke his leg in August, was rushed back into the veterinary hospital to have some of the metalwork removed from his leg as it was causing him problems. In fact his femur had not healed properly because one of the wires was rubbing the newly forming bone away.

I will add at this point that after a few days rest and strong pain killers Felix is back to his usual self, terrorising the household.

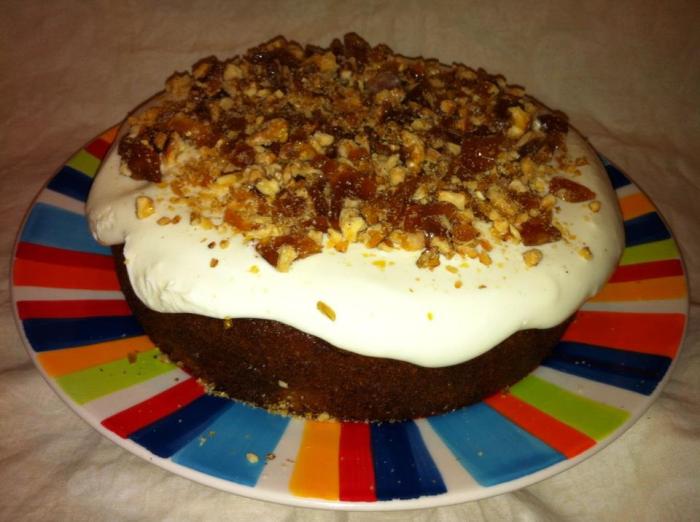
I’m sharing this carrot cake recipe because it is one of those cakes that instantly hits the spot! You know the ones, where the room goes quiet except for the odd “mmm”. And let’s face it, I could so with a bit of peace and quiet at the moment!

Ingredients:

  • 150g butter
  • 200g light brown sugar
  • 175g grated carrots
  • 0.5 tsp salt
  • 1 tsp mixed spice
  • 2 eggs
  • 200g SR flour
  • 2 tsp baking powder
  • 100g chopped walnuts (optional –or  add 100g extra flour)
  • rind of 1 orange (optional)


Method: 

  1. Grease and line an 8 inch cake tin
  2. Preheat oven at 180C / 160C fan
  3. Melt the butter .
  4. Beat in the sugar, carrots, salt, spice and eggs
  5. Fold in the dry ingredients
  6. Pour into the prepared tin and bake for about 1 hour


Topping ingredients:

Method:

  1. Mix together the cream cheese, orange juice and icing sugar. DO NOT BEAT as it will become runny.
  2. Spread over the cool cake.
  3. Melt the sugar and nuts gently over a low heat until the sugar is caramel brown in colour. Do not stir , simply swirl as the sugar will crystallise.
  4. Pour the mixture onto a piece of parchment paper and allow to cool completely.
  5. Chop the praline and scatter over the cake.


Pineapple Upside Down Cake

There are certain recipes that take you back to your childhood. Now, whilst pineapple upside down cake is not really one of my childhood recipes, it is one of my sister’s. There is an 8 year age gap between me and Naomi so she spent a lot of time with me when she was little due to Mum being a nurse and working long shifts.

One of my sister’s favourite past-times was “helping” me in the kitchen. I say helping but that is being kind, hindering may be a more accurate description! She used to drop eggs over the floor, knock the flour everywhere and generally cause chaos but I love her anyway!

Another of my sister’s little foibles, when she was younger, was her aversion to custard! She flat-blank refused to try it! Why I hear you ask? Because it was yellow and sounded like mustard which she had a pathological fear of! This fear was due to the fact that like many children, Naomi went through a phase of biting when she was about 2 years old. Mum punished her by putting mustard on her tongue! I am glad to say that she has finally grown out of both biting and avoiding custard which is a good job because this upside down cake is glorious warm and served with custard.

Ingredients:

Method:

  1. Pre-heat the oven to 160C fan/ 180C
  2. melt the butter and brown sugar together and pour into a greased and lined 8 inch cake tin
  3. Arrange the pineapples and cherries in the tin.
  4. beat the sugar and butter together until light and fluffy
  5. Beat in the eggs and vanilla extract
  6. Fold in the flour and baking powder
  7. Pour into the cake tin, ensuring all the fruit is covered
  8. Bake for 30-45 min or until golden brown and passes the skewer test.
  9. Allow to cool in the tin for 5-10 minutes.
  10. Place a serving plate on top of the tin then carefully invert it.
  11. Remove the tin and baking parchment.
  12. Serve either hot or cold.


Feel Good Minestrone Soup

I don’t think you can beat a good bowl of soup especially when you are feeling a bit run down or it is cold, wet and windy outside. I seem to get soaked to the skin every time I take the dogs out at the moment. I come home caked in mud up to my knees, with 3 equally mucky whippets and looking like a drowned rat! So today I decided that I would cheer myself up and make a pan of my minestrone soup.

Now I am sure that the Italians out there will say that I haven’t made it right but it is MY minestrone and it is the way I like it. I have to say I haven’t had any complaints from anyone who has had it.

I have been making this soup for well over 20 years since it kept me feed when I was a student in Liverpool. I would make a pot of it up and it would last 3 of us for the best part of the week. It was relatively cheap, packed full of healthy vegetables and more importantly soaked up the booze before a night out!

You can, of course, make this completely vegetarian but simply omitting the bacon and that is how I used to make it but I think the bacon just adds and extra depth of flavour. Leaving the soup overnight helps the flavour to develop, that’s if you can resist it, and it freezes really well too.

I love this soup and hope you will too!

Ingredients:

  • 500g chopped bacon, pancetta or lardons
  • 2 leeks, sliced
  • 4 carrots, sliced
  • 2 courgettes, julienne
  • 4 sticks of celery, sliced
  • 0.5 a small white cabbage, shredded
  • 500g green beans, topped and tailed, cut into small pieces
  • 2-3 handfuls conghigliette pasta or any other small pasta
  • 2 tbs pesto
  • 1 ltr passata
  • 1 can chopped tomatoes
  • 1.5-2 pints stock.
  • 1tbs brown sugar
  • salt & black pepper to taste

Method:

  1. put a splash of oil into a very large pan or stock pot and heat gently
  2. Add the bacon and fry until golden brown and crispy
  3. Add all the vegetables and stir to combine for a few minutes.
  4. Add the passata, tomatoes and stock and bring to the boil.
  5. Simmer until the vegetables are soft, about 30-40 minutes.
  6.  Add the sugar to counteract the acidity of the tomatoes then test for seasoning 
  7. Throw in the pasta and cook for a further 10-15 minutes (depending upon pasta used)
  8. Stir in 2 tbs pesto.
  9. Serve with a dusting of parmesan and plenty of crusty bread.


Silverwood Croquembouche Set – Product review

I don’t know about you but everytime I turn on a baking show at the moment they seem to be making a croquembouche! I don’t believe I have ever had one, however,  and to be honest with you,  everyone I have spoken to recently haven’t had one either! I blame The Great Britsh Bake Off! The contestants on the show are supposed to be amateur bakers but the skills they are expected to have are way beyond the normal cook!

I bought this croquebouche set because I have a sneaky feeling that I will start getting orders for croquembouches as wedding cakes soon. It happened with cupcakes, then whoopie cakes, then macaroons, then cake pops so I’m am expecting a croquembouch onslaught shortly!

I have quite a few Silverwood products and can honestly say I have never had a problem with them. My adjustable cake tin is fantastic so I had high hopes for this set. It wasn’t quite what I was expecting, however. I had visions of a big metal funnel because the ebay picture was not very clear and the description simply said a croquembouche set. That is not how it came however.  The set consits of a base, cap and flexible non-stick sheet that you wrap around into a cone shape. “That’s clever!” I thought and it is but in fairness it is a bit fiddly.

Firstly you need to make the cone shape. The sheet has a tab and slot setup but because the nonstick material is slippy the cone does not hold its shape very well. I followed the instructiosn to the letter but since they are written instructions and I am clearly a visual learner I did find them quite difficult to follow (and I’m not stupid! I have a PhD in muscle physiology!).  Eventually I resorted to using old Faithful and slapped some sellotape along the seem.


Although I have made Choux pastry in the past (my Nan has a thing for Chocolate Eclairs!) I promised myself that I would stick religiously to the method provided. I have to say when I read the recipe I had my doubts. I was taught that to make proper Choux you made a Roux then beat in the eggs until the “furry saucepan” stage and so on. This method was so diffierent  that I really saw this as an exercise in futility but I am glad to say I was wrong. I made up the ingredienst as per the instructions for making a large croquembouche but actually only made a small one because there is only the two of us and the profiteroles keep well enough in an airtight container.

Ingredients: (for crouquembouche formed outside the cone)

  • 375ml water
  • 150g butter
  • 175g plain flour
  • 5 large eggs, beaten

Method:

  1. Preheat the oven to 200C / 180c fan. (I deviated a bit by adding a small tray of water to the bottom of the oven because the steam helps the pastry to rise)
  2. Line several baking trays with parchment paper.
  3. Put the butter and water to be put in a pan, covered with clingfilm and bring to the boil.
  4. Remove the cling film with out getting second degree burns from the steam!
  5. Dump all the flour straight into the just boiled liquid  and beat to a smooth paste.
  6. Transfer the paste to a mixing bowl and allow to cool for 5 minutes
  7. Beat in the eggs a little at a time until the paste is smooth and glossy. (I used my Kenwood and poured the eggs in a slow, steady stream whilst the mixer was running but you can do it by hand)
  8. Spoon the mixture into a piping bag fitted with a plain 5mm diameter nozzle.
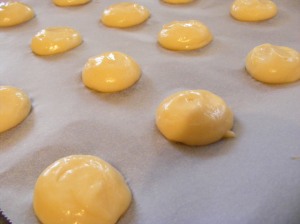
  9. Pipe 5cm diameter blobs into the lined trays, allowing room for the profiteroles to spread. Use wet fingers to flatten an peaks in the pastry.
  10. Bake for 20 minutes until golden brown and well risen.
  11. Remove from the oven and pierce the bottom of each profiterole with a skewer to allow steam to escape (This prevents the pastry going soft).
  12. Return to the oven for a further 3 minutes the remove and allow to cool completely on a cooling rack.
  13. Fill the profiteroles with either Creme Anglaise or Chantilly cream
  14. Melt togther the sugar and water and bring to a boil. The sugar is ready when the sugar thermometer reads 310F (154C)
  15. Plunge the pan into cold water to stop the sugar from continuing to cook from the residual heat in the pan. Make sure you do not alllow any water to get into the sugar as you will have to start again!
  16. Carefully dip the profiteroles in the sugar (THIS IS VERY HOT) then pile them inside or outside the cone. Inside is for a smaller croquembouche 
  17. Allow the sugar to set, at least 30 minutes, then carefully peel away the non-stick cone.
  18. Decorate with extra spun sugar if you desire.

All in all this is a decent little set. I think the company need to work on the cone a little or give better instructions on how to construct it as I clearly had issues but at the end of the day I produced a croquembouche! Plus I will be switching to this Choux recipe from now on because it was so easy!

Traditional Fruit Cake Recipe for a Celebration cake

I am asked time and again for my fruit cake recipe. More and more brides are choosing to have sponge wedding cakes but many still require a small fruit cake for cutting (Don’t get me started on why you can’t have a small fruit top-tier – just read my wedding cake post!).

To make a really good traditional fruit cake, it is essential that you have enough time to allow your cake to mature before it is eaten, at least 6 weeks if not longer. I personally like to get my Christmas cakes made over the October Half Term holiday so that they will be ready for Christmas.

Most fruit cakes contain some form of alcohol. The alcohol of choice is down to personal preference. I always use whiskey because I think it compliments the earthiness of the fruit whilst my best friend swears by brandy and even know someone who uses Armagnac. The alcohol is important because it acts as a natural preservative whilst the cake matures and, of course, adds another flavour dimension.

Traditionally the cake was always painted with boiled apricot jam before the marzipan was added but nowadays most bakers prefer to paint the cake with more of the alcohol used in the cake. This “sterilises” the cake surface before the marzipan is applied and so eliminates any potential microbial growth. Boiling the apricot jam is simply not as effective a method.

The recipe I use has been in family for years. It belonged to my Great Aunt Olive. She was the most amazing cook! I spent many an hour standing on a chair beside her whilst she made a batch of homemade fudge or mince pies. She didn’t have any children of her own so upon her death I inherited her cook books. This particular recipe came from a dog-eared copy of a now out of print Stork Recipe book.  This is one of the few recipes that I have not altered because, in my opinion, it is perfect as it is. If it was good enough for Auntie Ol then it is good enough for me!

I will be sharing my last-minute fruit cake recipe shortly  for those of you who leave everything to the last-minute (the cake is on the cooling rack as I type!)

The following amounts shown will be enough to make an 8 inch cake.

Ingredients:

365g currants

250g sultanas

150g raisins

90g glace cherries, halved and washed

90g mixed chopped nuts

90g mixed peel

zest of 1 lemon or 1tsp lemon oil

250g plain flour

1.25tsp mixed spice

0.5tsp nutmeg

60g ground almonds

225g margarine

225g brown sugar

1 tbs black treacle

5 eggs

Spirit of choice – whiskey, brandy etc

Method:

  1. Preheat the oven to 150C / 130C fan.
  2. Grease and line a deep 8 inch cake tin
  3. Cream the sugar and butter together until light and fluffy.
  4. Beat in the eggs, treacle and lemon oil.
  5. Stir in the dried ingredients and the ground almonds
  6. Fold in the fruit.
  7. Pour into the prepared tin and bake for 2.5-3 hours.
  8. The cake is cooked when a skewer comes out of the cake cleanly.
  9. Remove from the tin and place on a cooling rack. Stand the rack over a tray.
  10. Stab the cake all over with a skewer then apply alcohol liberally with a pastry brush. I tend to stop when the alcohol starts to drip into the tray under the cake.
  11. When completely cold, wrap the cake in greaseproof paper and place in an airtight container. Store for at least 6 weeks.

This cake should not need to be “fed” with more alcohol whilst it is maturing but I do paint it liberally with alcohol before I marzipan it. 

Wilton 3D Skull cake tin – product review

I don’t know about you but I have a stupid amount of cake tins. Admittedly I do make wedding and birthday cakes for a living but there are some tins I have only ever used once. I have either bought them for a specific cake or it was an impulse buy because it looked nice! I mean, do I really need a beehive shaped tin or a Christmas wreath tin? What can I say in my defence? Nothing!

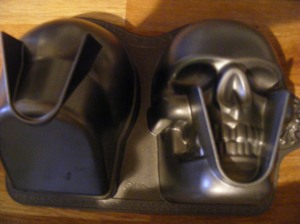
There are some shaped tins that I own, however, that I wouldn’t be without; my giant cupcake tin and a spherical tin are both used regularly. I have a feeling that this Wilton 3D Skull tin will be another. In fact I have already taken an order for a 60th birthday cake in January! I think this cake tin will pay for itself!

I am always a bit wary of shaped cake tins because invariably it does not do what the manufacturers say it does. The most common complaints being:

  • their example recipe is either in terms of shop bought cake mixes or if is simply inaccurate in terms of how much mixture is actually needed to fill the tins.
  • the cooking times are wrong or you have to cook each section separately because they each have a different cooking time.
  • the cakes stick to the tin which makes turning the cakes out very difficult and often results in the cake shape being damaged.

This particular cake tin had pumpkin spice pound cake as its suggested recipe to use. I personally am not over keen on pumpkin and certainly wouldn’t want a pumpkin flavoured cake. On review of their recipe and by converting cups to pounds and ounces I decided that my 6 egg maderia cake recipe should be a suitable alternative.

I made sure that the tin was well-greased and given a dusting of flour, preheated the oven and away I went. I split the mixture evenly between the two sections even though the one side does look like it needs more (it is a bit of an optical illusion!) and popped it in the oven at 160 C/ 140 C fan for 1 hour as per the manufacturers instructions.

Well, my first surprise was that they cooked perfectly in exactly 1 hour!

I left them in the tin for 5-10 mins then decided to turn them out onto a cooking rack. I fully expected to have to do battle with the tin to release the cakes but, surprise number 2, they turned out perfectly with no intervention from me!

Obviously the intention is for the two sections to come together to create a 3D skull shape but, as with all cakes,the tops are not perfectly flat. Wilton, however, have thought of that! They have designed their tins to have a “cutting” ridge. That means that once the cakes are cooked and completely cooled you can trim them using the cutting ridge as a guideline. The 2 sections will them fit perfectly together. I did find it necessary, however, to push a dowel through the cakes to stop the “face” cake sliding once I sandwiched them together with buttercream.

I cannot fault this cake tin! It is absolutely brilliant! I am sure that this tin will be escaping from cake tin purgatory on a regular basis! Well Done, Wilton!